info@edesiakbs.com
 781.238.8800
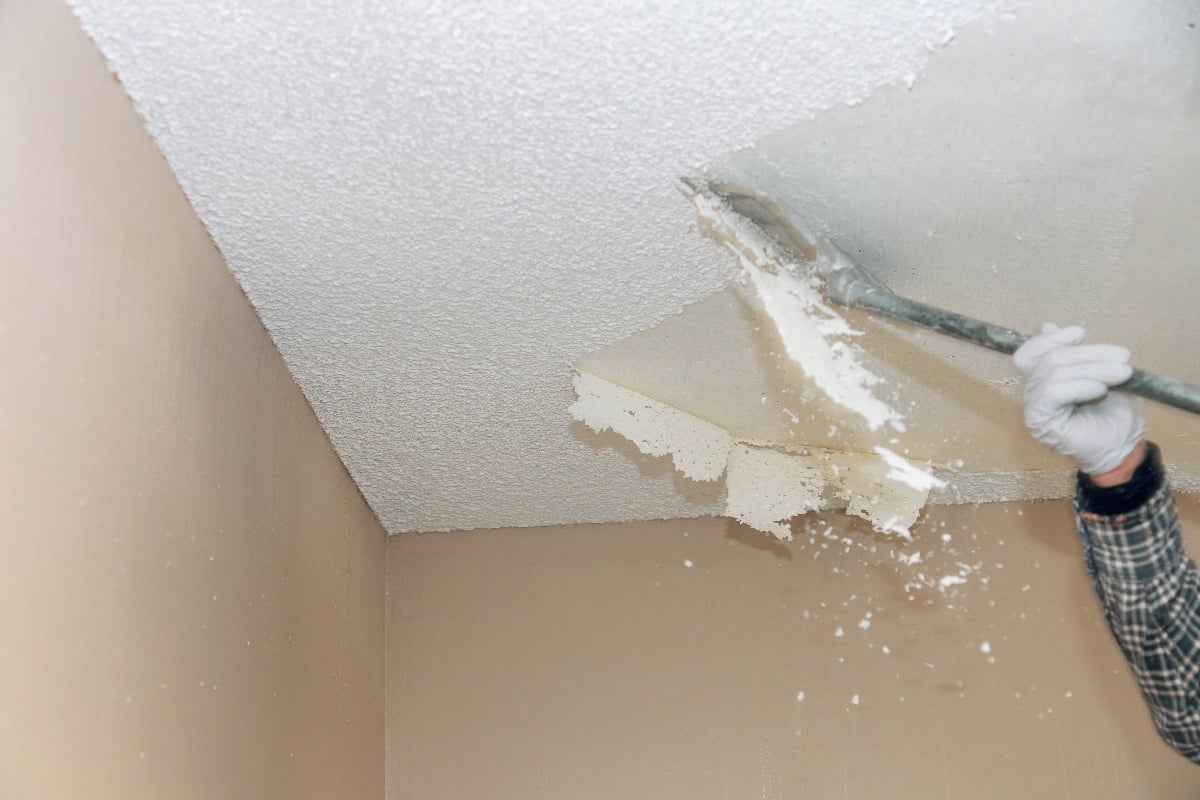
In the 1980s when many homes were built, popcorn ceilings are at the height of popularity. This spray-on texture provides acoustic dampening and hides imperfections in construction, but soon the disadvantages such as allergens and asbestos presence turned that trend around.You especially don't want that dust-dripping texture above your otherwise beautiful kitchen.
Today, thousands of homeowners every year are taking putty knives to the ceiling to scrape off that unpleasant popcorn texture. But what comes next? If you're curious about how to finish your ceiling after removing the "popcorn", Edesia has the answers.
1) Prepare the Ceiling for Painting
First, you'll want to prepare that scraped and probably dusty surface to receive an elegant coat of paint. Combine the use of a damp cloth and a sanding block to wipe away the last of the popcorn material and then sand the surface flat. If you have a hand sander power tool, this will go even faster.
2) Choose Your Paint Type
How do you want your ceiling to look? Now is your chance to define your kitchen's upper space with your choice of paint. Consider how much sheen you want, the color, and potential durability. You may want a dusty or satin look, muted or bold color, and might consider the importance of moisture resistance in your climate. But don't start painting yet.
3) Prime the Ceiling with a Quality Primer
Primer prepares a surface to receive and hold onto paint. It can help smooth your sanded surface and improve the quality of your paint when you apply it. Apply a high-quality primer that is designed to pair with the paint of your choice using a paint roller on a long handle. Depending on your kitchen building materials, a drywall sealing primer may also be appropriate.
4) Apply the First Coat of Paint to the Ceiling
Once the primer has set, you're ready to apply your first coat of paint. Use a clean (or cleaned) roller to carefully apply the first coat of paint with a long paint roller using firm rolls back and forth to get even coverage over your ceiling.
5) Touch Up Any Areas That Need Additional Coverage
As your first coat of paint dries, you will be able to see if there are flaws or thin spots in your painting job. This is your chance to add a second coat and to touch up any areas that need a little more attention.
6) Add Finishing Touches Like Molding or Wallpaper Borders
When your ceiling is beautifully painted and dry, the next step is to add the finishing details. If wallpaper borders will make your kitchen more elegant (or playful), lay them on the wall just below the ceiling. Then finish the room with crown molding to cover the transition between the walls and ceiling for a perfect and classic final touch.
7) Seal Everything in With a Clear Coat of Polyurethane or Varnish
Finish your kitchen ceiling with a durable clear coat. Clear-coating is a method that seals in the paint, the wallpaper, and the molding to prevent moisture damage and resist discoloration over time. Either a polyurethane or varnish can be a good choice for your final coat.
8) Enjoy Your New Popcorn-Free Ceiling!
At long last, your home is now free of the dreaded popcorn ceiling and now has a beautiful coat of paint with new molding to create a far more elegant space.
Professionally Remodel Your Upper Spaces
Of course, not everyone has the time or the endurance to scrape and repaint an entire kitchen ceiling the DIY way. Especially if you have more than one room to un-pop. If you want to remodel your space, including removing popcorn from the ceiling, Edesia can help you with the transformation, including beautiful ideas for upper-area paint, molding, or paper accents. Contact us today to explore more ways to modernize your kitchen and home.