info@edesiakbs.com
 781.238.8800
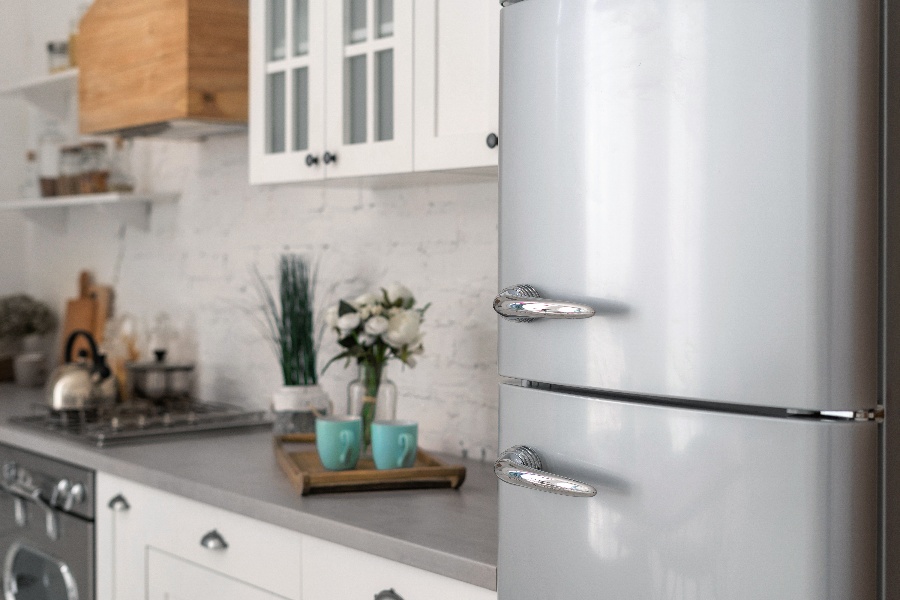
Refrigerator handles see a lot of use. Those refrigerator handles are constantly being tugged or leaned on. In a house with children, they might even be climbed or swung upon.
So if your refrigerator or freezer handles have cracked, it's happened to the best of us. The good news is that the process for door handle replacement is easy, all you need to do is order the replacements, unclip and remove the originals, then slide the new handles into place.
Depending on your refrigerator model, there may be a screw or two, but you won't even need to unplug the fridge.

As kitchen remodel experts, it's also worth mentioning that this is your perfect opportunity to customize your fridge. Refinish the fridge doors and sides while the handles are off and even paint your fridge handles a different accent color. Black refrigerators with gold handles are seeing a rise in popularity, for example.
Order Replacement Handle(s)
The first step for any replacement is to have your replacements ready. Before you begin investigating your fridge handles, find the model and serial number for your refrigerator (most likely along the door pocket). Then look up the proper part number for the replacement handles you need.
Order your handles online or take the parts number to your local hardware store and they will order it for you. An appliance repair service can also source the handles if they will be doing the replacement work.
Gather Your Tools
- Flat Screwdriver
- Cross Screwdriver
- Allen Wrench Kit
- Replacement Handles
Remove the Fastener Covers
Most refrigerator doors have covers that hide the fastening mechanisms. The clip-on and can be pried off so the handle can be removed or reinstalled. You will likely need to open one door at a time to access the panels.
- Find the Cover
- Locate the cover panel that hides the screws for each handle you plan to remove. it will be distinct. Some are on the front of the door, at the top or bottom of the handle. It might also be wrapped around the top or bottom of the door.
- Unhook the Tabs
- Use the flat-head screwdriver to pry up the covers. Sometimes, they will slide open like a battery cover, sometimes there are small latching tabs that hold the cover in place. Wiggle your screwdriver until you discern the mechanism and release the covers.
- Set Aside the Covers
- With the covers loose, set them aside somewhere you can easily find them again.
Remove Any Screws
Underneath the handle, covers is the hidden fastening mechanism. Some fridge door handles have a screw keeping them in place, some are simply slotted into place in plastic tracks.
- Spot Revealed Screws
- Take a close look at the spaces revealed underneath the covers. Is there a screw head? Determine if the screw head is an Allen-wrench hexagon or a normal cross. Determine the correct tool and size to use.
- Remove with Screwdriver or Allen Wrench
- With your tool, remove the screws holding your door handle in place - if there are any.
Lift or Lower the Handle to Release
The next part is unique to refrigerator and freezer door handles a style used rarely in other appliances. For these vertical handles, you will need to pull them up or down out of a locking slot.
- Determine If the Handle is Lift-Release or Lower-Release
- To remove your fridge door handle, you'll either need to pull it up or down. The handles on the top-most doors pull upward. This means top-freezers, the handles of side-by-side fridge-freezers, and the refrigerator handles of bottom-freezer models.
- The handles for lower compartments pull down. So for top-freezer models, the refrigerator handle pulls down.
- Pull Firmly in the Correct Direction
- When you know which way you are pulling (and are certain all fasteners are released), pull firmly. It may take a couple tries, there's a good chance your handle has "stuck" in place with years of aerated cooking grease and the occasional juice spill. Tug firmly until the handle comes loose.
- Remove the Handle
- Now you can decide what to do with the removed fridge handle. Most likely, you will want to throw a broken handle away.
Installing the New Refrigerator Handle(s)
Now you are ready to install your new refrigerator or freezer handles. Fortunately, the process is even simpler in reverse.
- Slide Into Place
- Align your handle with the tracks and slide it up or down in the correct direction. Press firmly, there will often be a latching sound as the handle settles into place.
- Return the Screws
- With the handle in place, return any fastening hardware that was used. Make sure all tabs have clipped and if there were screws, line them up with the holes and screw them back in. Tighten until you feel the screw give that distinct sticking resistance. Don't over-tighten, or you'll crack the plastic. Tighten just enough that the handle won't wobble.
- Return the Covers
- Now clip those end covers back on. Line each of the 2-4 covers over the edges of your door handles and clip them into place. Make sure you hear their plastic tabs fastening to be sure the job is done.
Enjoy Your Refrigerator
Time to congratulate yourself. If you have just completely replaced one or two refrigerator door handles, then pat yourself on the back. You can now clean up your tools and return to enjoying your refrigerator new style and confidence you could fix it again. Remodeling your kitchen isn't just about redesigning the look and feel of your kitchen.
It's also about taking charge of every element of your kitchen design, including little details like your refrigerator handles. Contact us for more awesome kitchen design ideas and skills to fully master your kitchen's form and functions.